Sunday, April 17, 2011

April Stamp Club

I had a terrible time coming up with projects for stamp club this month. A project I had in mind simply would not come together and at the last minute I was desperately searching Splitcoast for ideas. Here is the card that we made using the Strength & Hope stamp set:


This project was cased from Jen Sannes on Splitcoast. Check out her blog: http://www.simpleandsincere.com/2011/04/strength-hope-swap.html. I modified my project just a little bit but thank Jen for her inspiration.

Another project for club was cased straight out of the Occasions Mini!!! The Idea Book and Catalogue and the minis are definitely great sources for ideas as well. I had ordered the beveled windowpanes from the Occasions Mini months ago and had been dying to use them. It seemed like it was now or never as the mini will be done the end of April. However, I am very excited to see that the windowpanes are on the mini carry over list!!! This is the card we made using the windowpanes:


I absolutely love this card. The card base uses Crumb Cake card stock embossed with the Framed Tulips Embossing Folder. The layer is from the neutrals patterns stack with a trim of Pacific Point on the bottom. The ribbon is the Pear Pizzazz seam binding ribbon and the stamp set used is Clearly for You.

Lastly we made a Mother's Day card using the faux mother of pearl technique. Frost White shimmer paint is applied to shimmery white card stock using a crumpled up ball of cling wrap dipped in the paint. These butterflies were cut using the Big Shot and the Beautiful Butterflies die. After the paint dried, we stamped the flowers from Elements of Style using black stazon and colored them using rose red and old olive markers. Burnishing the butterflies with a cloth removes the ink from the pearl and gives it some shine. The card base uses Rose Red card stock, a layer of Springtime Vintage DSP and another strip of Rose Red trimmed with the scallop border punch. The lovely ribbon is Rose Red seam binding ribbon. Here is the card we made in class:


and here is a stepped up version:


I felt that the top part of the card was too plain so I stamped the vine from the Elements of Style using Rose Red ink onto the Rose Red card stock. Adding another pearl to the card was also important!!

Thank you for stopping by. Take care.

Pat

Mommy and Me Easter Class

Last Sunday I had some of my favourite little stampers and their mothers attend my Mommy and Me Easter Class. It is so fun to share the joy of crafting with people of all ages!!

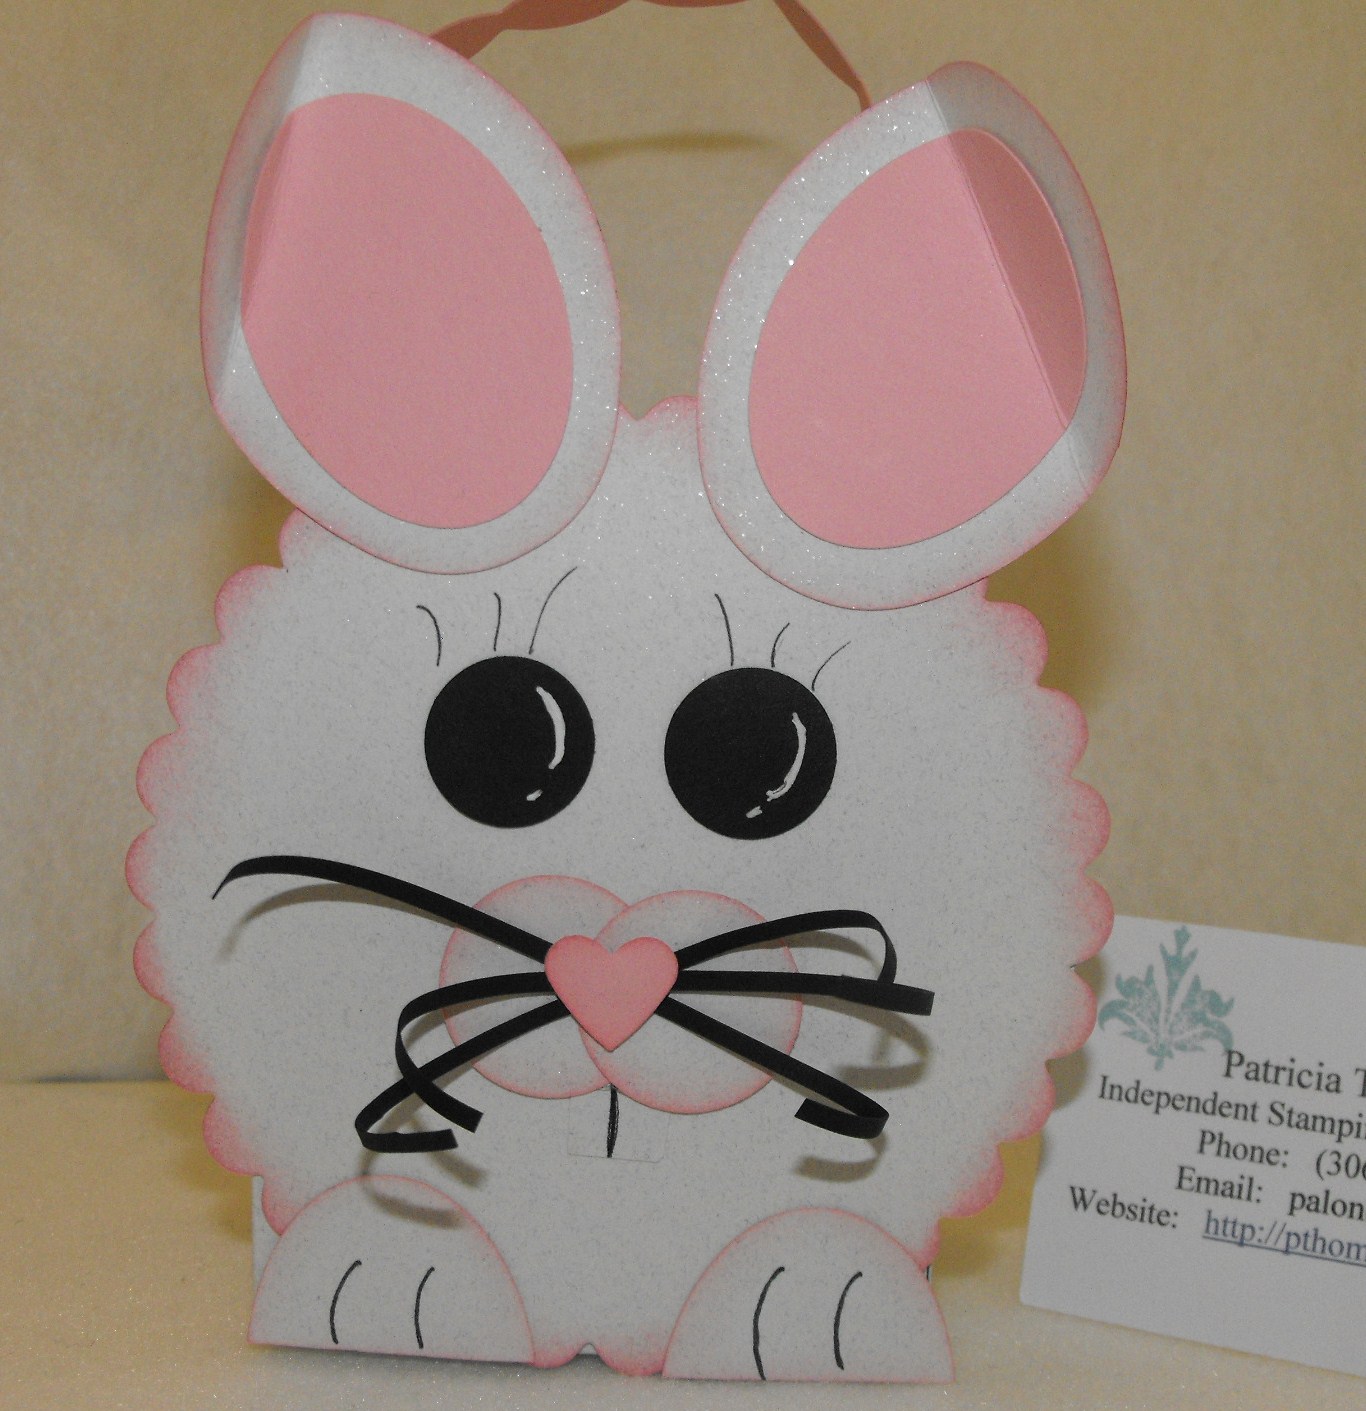
Here is the Easter Bunny basket we made:


This basket was cased from Chris Galbraith. Check out her wonderful blog: http://chrisgalbraithcreations.blogspot.com

Another project for the class was a cute little spring nest:


This project was also cased. The talented Brenda Quintana was my source for this project. Check out her blog: http://qbeesquest.blogspot.com/2011/03/easter-nest.html

Thank you to all of the wonderfully talented people out there that are willing to share their projects with the rest of us.

Lastly, we made an Easter card that incorporated a little bit of punch art:


The card base used the Naturals White card stock and the grass and ribbon are Pear Pizzazz. The eggs are from the Easter Blossoms in the Occasions Mini, stamped in versamark on Pretty in Pink, Bashful Blue and Pale Plum card stock and heat embossed using Iridescent Ice embossing powder. Our tired little chick was punched from So Saffron using the scallop oval punch and sponged around the edges.

It was a very enjoyable afternoon and I look forward to my next Mommy and Me class.

Thanks for stopping by.

Pat

Thursday, March 31, 2011

Fundraiser projects

It feels so satisfying to cross off all those items on my to do list. My last project this week was to make items to donate to a local fundraiser. I have created two baskets, although I'm not sure if the one basket is worth giving as it seems kind of blah.

Here is the basket I am donating for sure:


This basket contains a keepsake box that holds 10 handcrafted cards with envelopes, a stamped candle, a bookmark and a sticky note holder with pen. Here are some individual pictures of these items:


It was so much fun putting these items together. The keepsake box is so perfect to give as a gift filled with cards. These items use my current favourite stamp set - Bliss - from the Sale-a-bration catalogue. Today is the last day to earn SAB goodies so I made sure to get one last order in so that I could earn another Bliss set to give away at some point.

The other basked contained stamped tile items - a tea pot trivet and two coasters. I made a card to match as well. Somehow this basket seems so bland compared to the first one:


Sorry - the picture of the card isn't the best because I forgot to turn on the flash.

So, since it has been such a busy week and there has been a shortage of sleep, I will leave it at that so I can go to bed!!! Thanks for stopping by.


Pat

Monday, March 28, 2011

Farewell cards

It has been a little while since my last post but life has been incredibly hectic again. This week I needed to work on some farewell cards. The office I am working in is closing as the partners are retiring and the support staff are moving on. Here is the card I made for the ladies I work with:


This card incorporates a bookmark as shown in the second picture. The card base is Soft Suede with a layer of Elegant Soiree DSP and a scallop border of Baja Breeze. The background stamp is from the SAB set, Bliss, which I absolutely love!! The front sentiment is Very Vanilla cut using the scallop rectangle clearlit stamped with a phrase from You're a Gem set and the flower from Bliss. This flower was inked using the rock 'n roll technique with Crumb Cake and Baja Breeze. The bookmark was cut using the Big Shot and the two tags die. I cover pieces of cardboard front and back with DSP (Elegant Soiree was used here) using a glue stick, let it dry and then run through the Big Shot. The ribbon is the Baja Breeze seam binding and the butterflies are cut from Baja Breeze using the Big Shot and the Beautiful Wings embosslit. Of course, no project is complete without the addition of some basic pearls.

This is the card I made for one of the partners who is an avid history buff and a lover of planes:


This card uses the set Plane & Simple from the Occasions Mini. Very vintage and very versatile for those hard to make masculine cards. The card base is Chocolate Chip with a layer of DSP from the neutrals pattern pack trimmed with some retired cord.

It will probably be another week before I can post again and then hopefully I will be more consistent. Thank you for stopping by. Take care.

Pat
Thursday, March 10, 2011

Blissful moments

Hello everyone. Well, it is almost the end of another busy week. The highlight of my week was Stamp Club on Wednesday. I sure do look forward to seeing my ladies. This week we worked on a 12 x 12 scrap page. Planning a scrap page is still stretching my comfort zone but this layout came to me when I thought of the Bliss stamp set:


I told the ladies to bring two pictures of what they felt captured blissful moments. It is so neat to see what everyone's version of bliss is. Of course, chocolate seems to be a favourite amongst most of us. This layout used the Bliss and Notes & Details stamp sets. The Notes & Details set is perfect for scrapping. The colours used on this page were Crumb Cake, Early Espresso, Very Vanilla and Always Artichoke. My favourite model was kind enough to provide the action shots. :)

Here are two cards that we did for Club, in addition to the scrap page:


The Easter card was CASED from Kimberly Van Diepen who happens to be totally awesome. Check out her site: http://stampinbythesea.com/ I am her number one fan. This card uses the emboss resist technique. Kim's version used the Bliss stamp. The only thing I changed was to use the Easter Blossoms set instead. The card base is Baja Breeze, the top note is Whisper White sponged with Baja Breeze. The background stamp is En Francais in Crumb Cake. The embellishments are Crumb Cake seam binding ribbon and a basic pearl.

Our last card was quick and simple and would make a good masculine birthday card. This card uses the Bring on the Cake stamp set stamped on Very Vanilla using Soft Suede. This was then punched out with the 2 1/2" circle punch, sponged with Soft Suede then layered on Gold Shimmer paper. The card base is Soft Suede with a layer of Soft Suede patterns paper from the Neutral Patterns Stack and a strip of Very Vanilla run through the crimper. (The crimper is making it's way back!!! Yay) We touched up the top of the card by paper piercing the corners using the mat pack and the paper piercer. Simple!!!

So that's what I've been up to lately. I have more projects to work on this weekend and will post picks soon.

Thanks for stopping by. Take care.

Pat

Saturday, March 5, 2011

Still going ....

Well, after being up most of the night, I did squeak in a little nap this afternoon. I thought it was time to rest my eyes when I started working with polka dot paper and the polka dots kept swimming before my eyes. Here is the card that I finished before my little siesta:


This card uses a Chocolate Chip card base with a Whisper White layer that has been run through the Big Shot using the Perfect Polka Dots embossing folder. The circle is punched from Pretty in Pink using the 2 1/2" circle punch with edges sponged with Rose Red. The image is stamped using the Create a Cupcake set and punched with the cupcake punch. Between the stamp set and the cupcake punch, options are endless and it doesn't even need to be a cupcake. I have seen some beautiful examples and will have to CASE some soon. The cupcake circle was spritzed with shimmer mist and popped up on dimensionals. The bottom layer incorporated some expired product (sorry!). Chocolate chip taffeta ribbon prettied up the layer of Love Patterns DSP which was layered on chocolate chip punched using the scallop border punch.

Whew - what else can I create today before I finally crash? Check in later to see what I have come up with. Thanks for stopping by.

Pat

Baja bender

In my last post I mentioned I had been dreaming stamping dreams that seemed to focus on Baja Breeze glass glitter and Baja Breeze seam binding ribbon. Well tonight, or this morning I guess it is now, I woke up at 1:49 am and could not go back to sleep. Some of my best ideas for projects seem to come to me at night and that seemed to be what happened this time. Of course, with all of the excitement of these creative ideas, I could not go back to sleep. So finally at 2:20 am I crept down to my stamping space and went on a BENDER - a Baja Breeze Bender!! For this card I only used the Baja Breeze glass glitter and not the seam binding ribbon. That beautiful ribbon was used on another card that we will be doing for club this Wednesday. Here is my Baja Breeze card:


The stamp set used for this card was the Easter Blossoms set in the Occasions Mini. The card base is Baja Breeze, of course, stamped with the cherry blossoms in Baja Breeze. Layered on top is a piece of whisper white cut with the Big Shot using the Oval Scallop Frame die. This die cuts two pieces, the centre oval and the scallop frame. Using the Big Shot again, I put the scallop frame in the Petals-a-Plenty embossing folder. Some sponged Baja Breeze ink on the frame makes the flowers pop. The little girl was stamped with Baja Breeze ink on the centre oval with the sending spring smiles sentiment. Baja Breeze glass glitter was adhered to the edges of the oval using Tombow glue. I love using sticky strip with the glass glitter but this is not really convenient unless you are glittering in a straight line. The centre oval was popped up with dimensionals.

So now it is 6:00 am and I really do feel like I have been on a bender!!! I did manage to get a lot done though - an Easter card and a Bliss scrap page have been my accomplishments in the last few hours. One more project to prepare for club and I'm golden. I seem to be having trouble making things straight so there are some drawbacks to these late night stamping sessions. :)

Check in again soon as I will post the club projects after Wednesday. Thanks for stopping by. Take care.

Pat